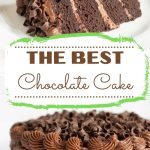
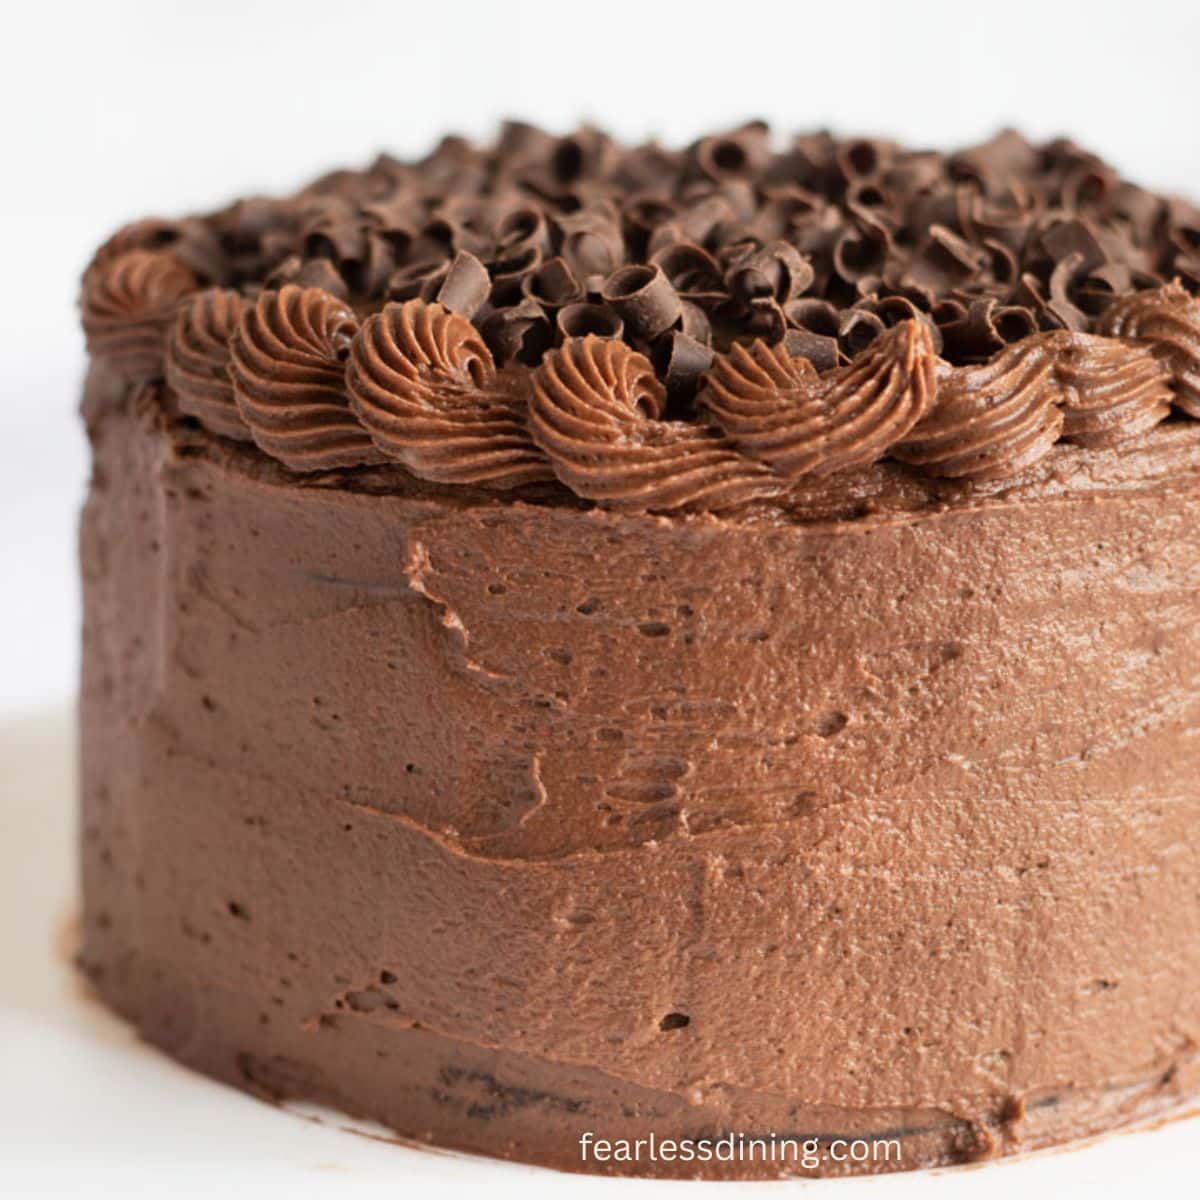
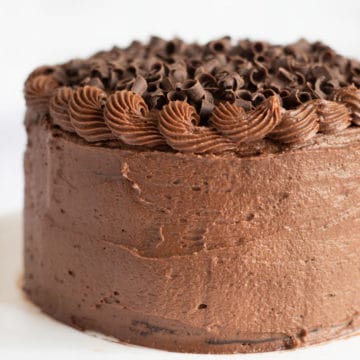
This homemade gluten-free chocolate cake is rich, moist, and loaded with deep chocolate flavor! Every bite is decadent, and it is topped with a luscious homemade cream cheese frosting. Sour cream helps keep this cake moist. Serve it for a birthday, as a groom’s cake, or for any celebration. Nobody will know this cake is gluten-free.
This post may contain affiliate links. Please read our Disclosure Policy.
❤️ Sandi’s Recipe Summary
The Quick Bite: I have perfected this gluten-free chocolate cake recipe over the past 8 years to ensure it will turn out perfectly for you. This cake is made with simple ingredients, including sour cream for extra moisture. I tested it with multiple gluten free flour blends to help you know which to use.
After making and refining this recipe over the years, this is the cake everyone in my family wants me to make for their birthday. Not only is it a family favorite, but several bakeries have sent me emails telling me it is their go-to recipe for groom’s cakes. It feels good when bakeries trust my recipe for their clients.
We are chocolate fans, and I have a lot of tried and true gluten-free chocolate dessert recipes on the blog. If you prefer a lighter chocolate cake, this Gluten-Free Devil’s Food Cake recipe also gets rave reviews. They are guaranteed to help you with those chocolate cravings!
I bought the mini pans and made this for Thanksgiving! It turned out sooooo good! Even my picky non-gluten free kids loved it and said , “Hey, it doesn’t taste gritty’!
becky r., pinterest commen
The frosting was to die for as well!”
Like many of my long-standing recipes, this cake has evolved as my gluten-free baking techniques improved over the years. This cake recipe was originally created in 2017.

A Note From My Kitchen
As noted above, I have tested this recipe multiple times over the years. I have made a few tweaks to make it turn out moist and delicious. I tested two gluten-free flour blends, and both performed well. I do recommend letting the cake batter rest for 15-20 minutes, which allows the rice flour to soften. This is more important using Bob’s 1:1, which is a little grittier than King Arthur’s blend.
If you use a gluten free flour blend I haven’t tested, you will need to tweak the moisture level with a little more milk or flour. Make these adjustments with flour and milk one tablespoon at a time so you can control these adjustments more easily.
I have also tested making a dairy-free version (using King Arthur Measure for Measure), and it yielded the same results. See the substitutions section below for the dairy-free ingredients I tested.
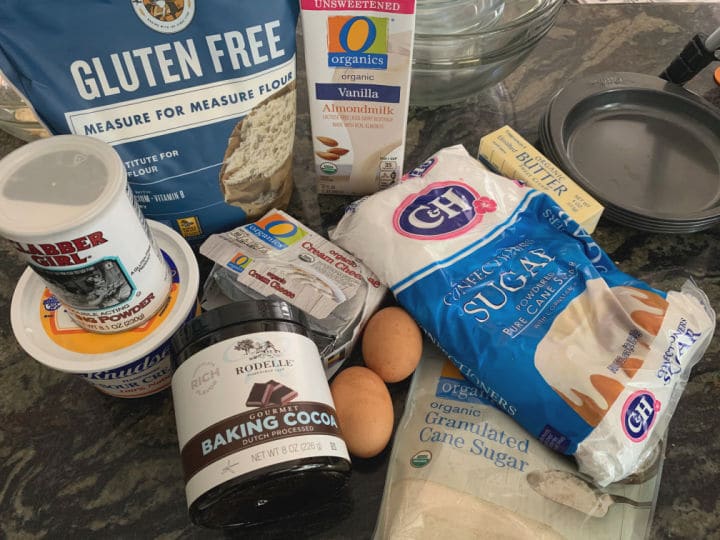
Ingredient Notes:
For the full list of ingredients and amounts, please go to the recipe card below.
Gluten-Free Flour Blends Tested:
- My Tested Gluten-Free Flour Blends: I tested this recipe using Bob’s Red Mill 1 to 1 and King Arthur Measure for Measure. Other blends should work, but you will have to watch the moisture level. Each blend has a different grain-to-starch ratio, so you may need to adjust. Read Why Gluten-Free Flour Blends Vary to learn more. Note, these blends work well for cakes and quick breads, but I do not recommend them for yeast-based gluten-free baking.
- Reader Tested Blend: Pamela’s Artisan Flour Blend.
The rest of the ingredients:
- Binder – A binder is important in gluten-free baking. If your blend doesn’t contain one, add 1 teaspoon of xanthan gum. Learn Why Binders are Important in Gluten-Free Baking to learn more.
- Cocoa Powder – I love Ghirardelli and Anthony’s brands of cocoa powder. My testing has shown they have the best chocolate flavor. Almost all cocoa powder is gluten free, but always check the label.
- Sour Cream – This is what helps keep this cake so rich and moist. I recommend using full-fat sour cream in this cake.
- Eggs – Use large eggs for binding and fluffiness.
- Butter – I recommend unsalted butter.
- Milk or Non-Dairy Milk – I used almond milk in my recipe testing. If you are nut-free, use any plant-based milk except canned coconut milk, which is too thick.
- Baking Powder/Baking Soda – Use baking powder for Dutch process cocoa and black cocoa powders. Use baking soda for regular cocoa powder.
- Cream Cheese – Let the cream cheese warm to room temperature before using it to make your frosting.
Substitutions:
- Make it dairy-free – You can easily make this gluten free chocolate cake dairy-free by substituting the cream cheese for a dairy-free cream cheese like the one from Kite Hill. Also, substitute the yogurt for dairy-free yogurt.
- Make it nut-free – The only nuts in this recipe are in almond milk. Substitute soy milk or another non-dairy milk to avoid almond milk.
- Make it gum-free – To make this cake gum-free, meaning there is no xanthan or guar gum, use my DIY Gluten Free Flour Blend.
- Make it butter-free – If you want to make this gluten free chocolate cake with oil instead of butter. That is fine, and I tested this recently. I recommend using a light oil, not a strongly flavored one. (This is for the cake and NOT the frosting.)
- Swap plain yogurt for the sour cream – If you don’t have sour cream on hand, plain yogurt also helps retain the moisture in this chocolate cake recipe.
How to Make a Gluten-Free Chocolate Cake (Step-By-Step)
Email This Recipe To Me!
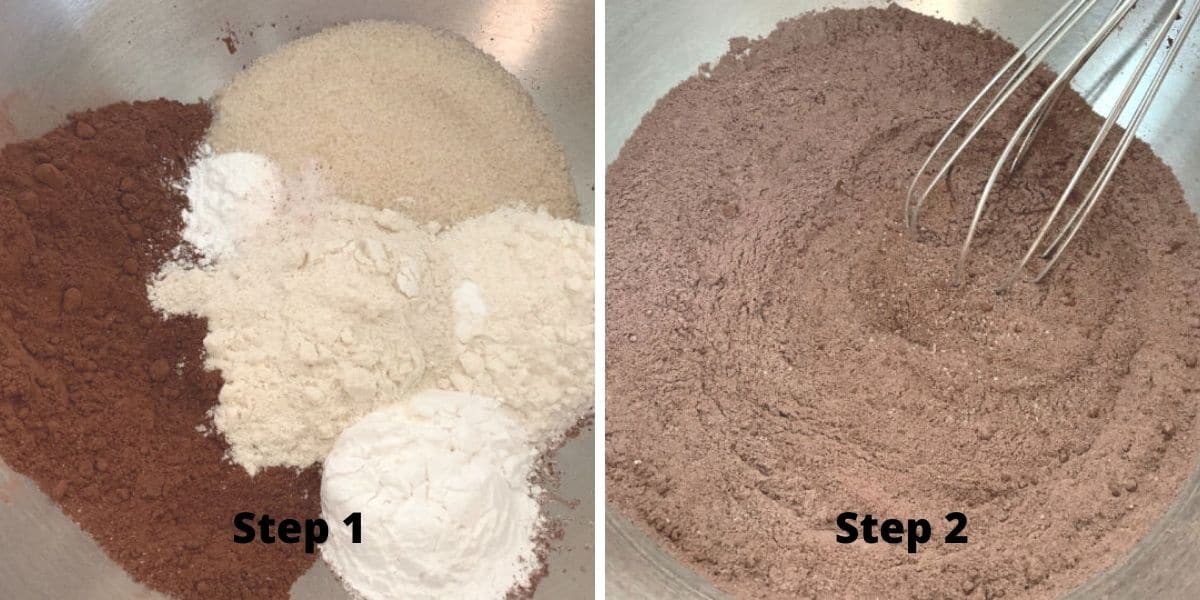
Step 1: Add the dry ingredients to a large mixing bowl. If you notice many lumps in your cocoa powder, I recommend sifting it into the bowl. This will make your cake’s consistency more even.
👀 Sandi Says: To measure gluten-free flour, use the spoon-and-level method. Avoid scooping directly from the bag, which can pack too much flour and lead to a dry cake.
Step 2: Use a whisk to blend the dry ingredients. Don’t forget that if your gluten-free flour blend doesn’t contain xanthan gum or another binder, add 1 teaspoon to the dry ingredients.
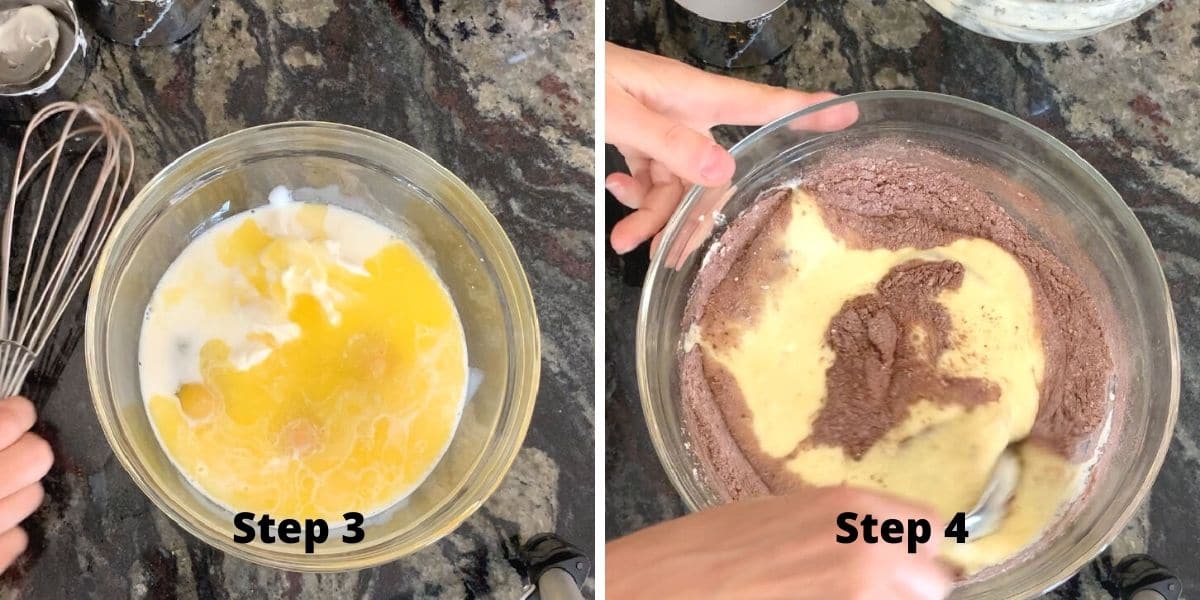
Step 3: Add the wet ingredients to a smaller bowl and whisk to blend. I like to partially melt my butter to make the mixture smoother.
Step 4: Pour the wet ingredients into the dry ingredients. Mix the wet and dry ingredients in the bowl with a large spoon until they are just “barely” mixed. This is one of the secrets to a fluffy cake.
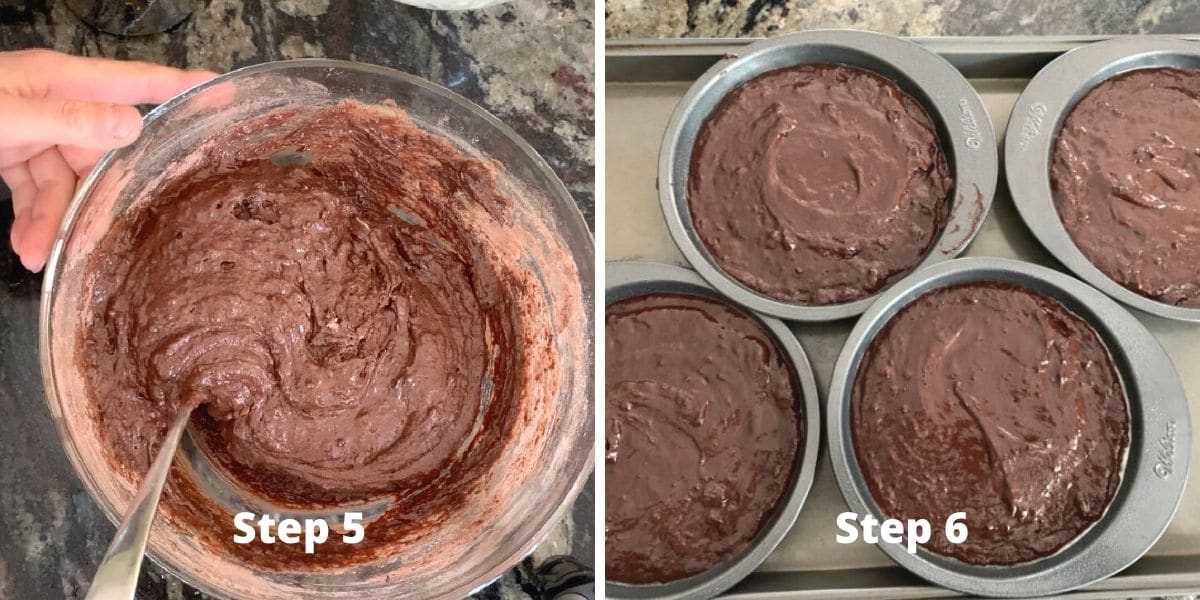
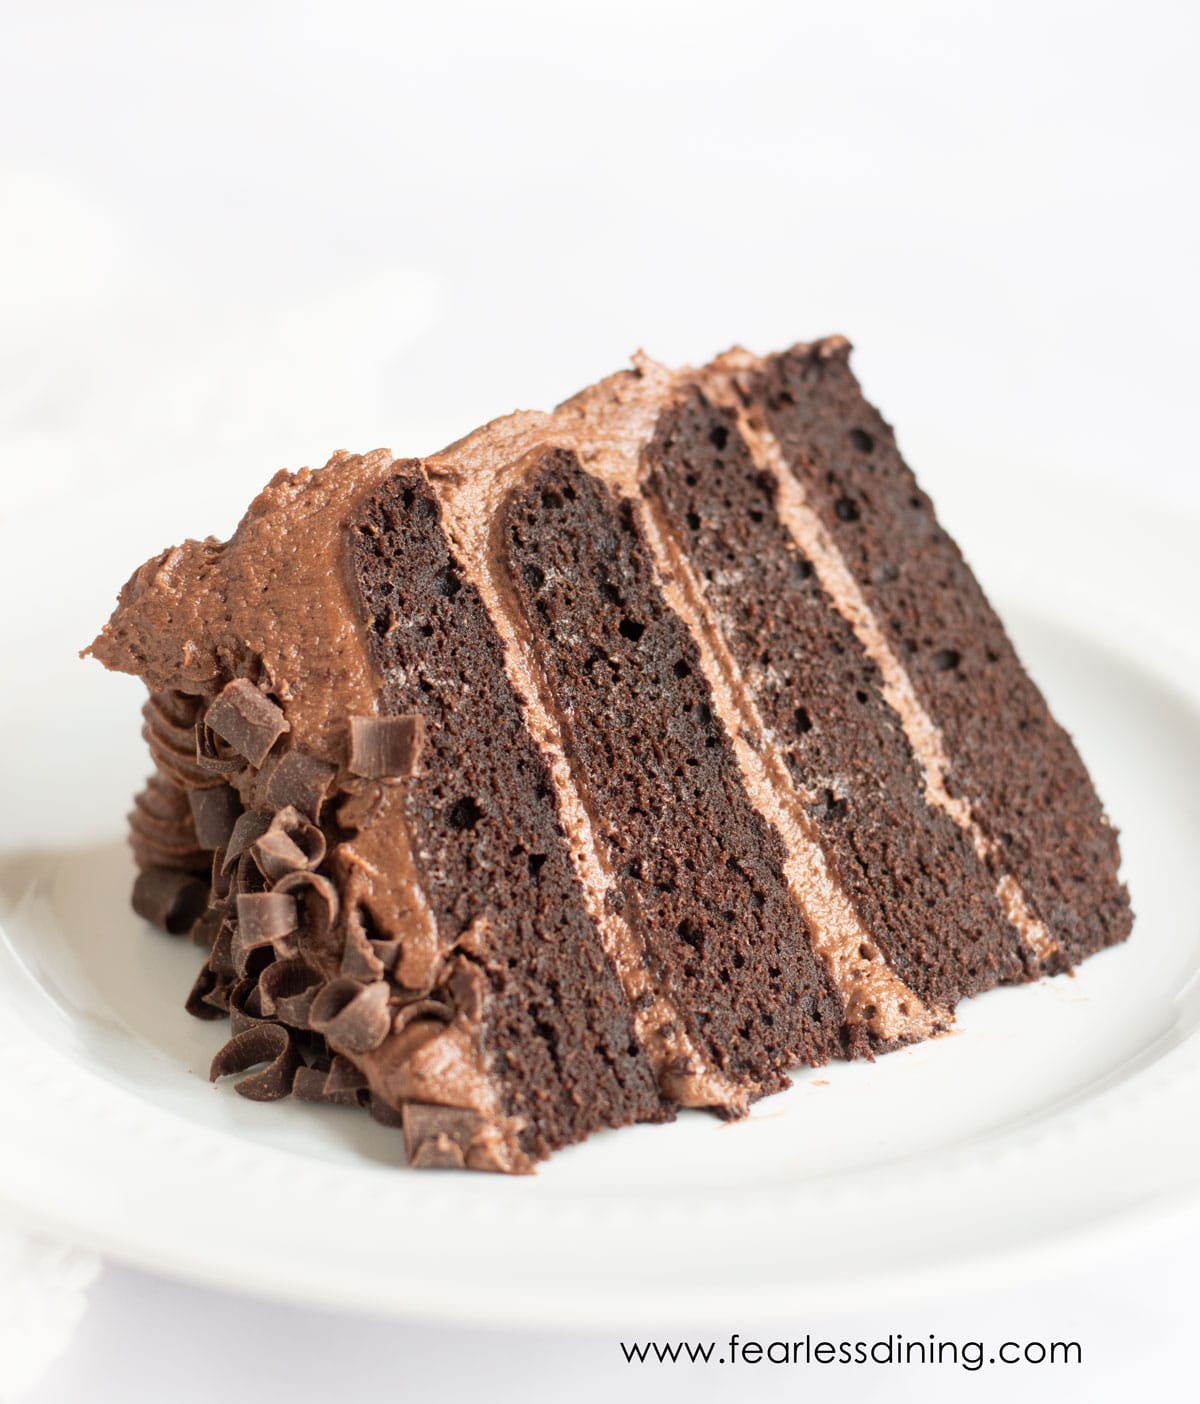
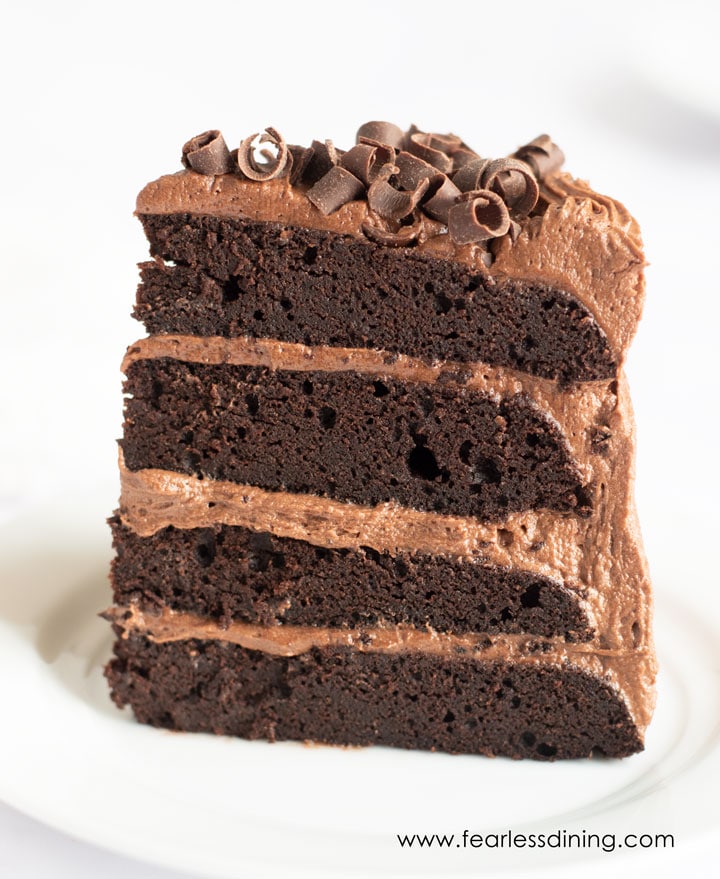
I used this cute set of mini-layer cake pans. These pans make layer cakes so easy to make. You can choose how many layers to make your cake. You can also use this fudgy chocolate cake batter to make a sheet cake or cupcakes.
Step 5: Compare your cake batter to mine to make sure yours has the right consistency. This is the consistency of my batter. It is a nice, rich chocolate color.
Step 6: Spray your cake pan with gluten free baking spray and add the batter to the mini cake pans.
🎂 Sandi Says: I highly recommend baking your gluten-free cake on the bake oven setting, not the convection setting. After years of practice, I truly believe the regular bake setting helps gluten-free cakes bake more evenly.
Step 7: Bake the cake. The bake time will vary depending on the pan in which you bake your cake in.
Step 8: Remove the cake from the oven and cool completely before frosting.

Step 9: While the cake is cooking, prepare the chocolate cream cheese frosting.
How to frost this cake like a pro:
- Look at each layer of your cake. If you see the cake domes, use a serrated knife or cake leveler to trim the tops for even layers. This ensures a stable, professional-looking cake.
- Take a turning cake stand and add a small dollop of frosting to the center of the stand to prevent sliding. I love this cake stand because it comes with the right spatulas and bench scraper for frosting the cake!
- Place the first cake layer flat side down.
- Spread an even layer of the chocolate frosting over the top of the first layer using a spatula.
- Place the second cake layer on top, flat side up, for a smooth surface.
- Gently press down the layer of cake to ensure it adheres to the frosting beneath.
- Apply a very thin layer of frosting all over the cake to trap any crumbs.
- Smooth it out, then chill the cake for 20 to 30 minutes to set the crumb coat.
- Apply a generous layer of frosting over the entire cake. Use an offset spatula to spread it evenly.
- Smooth the sides of the frosted cake using a bench scraper while turning the cake stand.
Read my Gluten-Free Baking Tips to learn more. I also have a Gluten-Free Cake Troubleshooting Guide to help you perfect your gluten-free cake baking.
Make it fancy!
- I used Toll House Chocolate Curls, which I found at my local grocery store, to top the cake. If you want to make your own chocolate shavings or curls, this easy tutorial on how to make chocolate shavings is easy to follow.
- Double-check my list to ensure your sprinkles are gluten free.
If you want to bake more chocolate recipes, try these moist Gluten-Free Chocolate Brownies. Need a quick single-serving chocolate cake recipe? Try my Gluten-Free Chocolate Mug Cake recipe!
Tips For Success
1. Do not use a stand mixer to mix your cake batter. It will overmix the batter, resulting in a denser cake.
2. To prevent the cake top from cracking while baking, be sure your oven rack is set to the middle position. You also want to ensure your oven temperature is accurate.
3. This gluten-free baking spray is my favorite for preventing the cake from sticking to the pan.
Frequently Asked Questions:
Yes! I recently tested this cake with light oil, and it worked well. Just avoid strongly flavored oils like olive oil.
Store the cake in an airtight cake container in the refrigerator. It will keep fresh for up to 4 days.
Yes, I recommend freezing the baked cake layers unfrosted so they don’t get soggy when the cake thaws. Wrap the cake layers in plastic wrap, then cover tightly with foil. Place each layer in a gallon-sized freezer zipper bag.
My dearest friend is now following a gluten free diet. This cake was my first foray in baking for her — holy heck, she LOVED it! Even the non gluten free people loved it. Its nice to make something to rave reviews while still following their dietary requests. Ill be making this often!”
Michele W.
More Gluten-Free Cake Recipes:
- Gluten-Free Vanilla Cake – If you prefer a vanilla cake for your special event, this is the one bakeries trust.
- Gluten Free Lemon Layer Cake – This decadent cake has lemon curd nestled between the layers.
- Gluten-Free Hummingbird Cake – Another delicious celebration cake.
- Gluten Free Chocolate Pumpkin Cake – This fluffy, delicious gluten free cake is a great cake to bake for fall.
Love This Recipe?
💬 I would love to hear how your cake turned out! Let me know which gluten-free flour blend you used. Your tips help other bakers succeed, too.
Gluten Free Chocolate Cake (Rich and Decadent!)
Ingredients
Cake:
- ¾ cup cane sugar
- ¾ cup cocoa powder (*see note)
- ¾ cup gluten free flour blend (*see note)
- 3 eggs size large
- ½ cup unsalted butter softened
- 1 teaspoon baking powder + dash of salt
- ¾ cup almond milk or other milk
- 6 ounces sour cream *you can also use yogurt
Frosting:
- 8 ounces cream cheese room temperature
- ½ cup unsalted butter room temperature
- 3 ¾ cups powdered sugar
- ½ cup cocoa powder
- 1 teaspoon pure vanilla extract
Instructions
- Preheat the oven to bake 350º F and set the oven rack to the middle of the oven.
- Add the dry ingredients to a large mixing bowl. If you notice a lot of lumps in your cocoa powder, I recommend sifting it into the bowl. This will make your cake's consistency more even.
- Use a whisk to blend the dry ingredients. Don't forget if your gluten-free flour blend doesn't contain xanthan gum or another binder, add a teaspoon to the dry ingredients.
- Add the wet ingredients to a smaller bowl and whisk to blend. I melt my butter to make the mixture smoother.
- Pour the wet ingredients into the dry ingredients. Mix the wet and dry ingredients in the bowl with a large spoon until they are just "barely" mixed.
- HINT: Do not over-mix your cake, or it will not be as light and fluffy! I never use a standing mixer to mix gluten-free cake batter. It makes your cake turn out more dense.
- Note: Every gluten-free flour blend has a different starch-to-grain ratio. The brand of gluten-free flour you use will affect the moisture of the batter. If your cake batter is too runny, add more flour, and if it is too thick, add more liquids.
- Spray your cake pan with gluten free baking spray and add the batter to the mini cake pans. You can also make a 9×13 sheet cake with this chocolate cake batter.
- Bake the cake at 350º F for 20 minutes. The bake time will vary depending on the pan in which you bake your cakes.
- How to check to see if the cake is finished baking, insert a toothpick into the center of the cake. If the toothpick comes back clean, the cake is ready. If there are crumbs or batter on the toothpick, it must be baked longer.
- If the cake is fully baked, remove it from the oven and let the cake in the pan sit for 5 minutes. After 5 minutes, gently tilt the cake out of the pan onto a cooling rack. Letting it sit in the pan for 5 minutes allows the cake to settle and makes it a lot easier to get it out of the pan without breaking.
- Pro TIP: Let the cake cool completely before frosting it. Otherwise, your frosting could melt. If you are in a hurry, cool your cake in the refrigerator.
- While the cake is cooking, prepare the chocolate cream cheese frosting. Add the butter, cream cheese, cocoa powder, and powdered sugar to the bowl of a stand mixer. Put on a whisk attachment.
- Mix the homemade chocolate cream cheese frosting in a standing mixer. Start at a low speed and gradually increase the speed. Whip for 3-4 minutes until the frosting is nice and fluffy. (Be sure your butter and cream cheese are at room temperature so your frosting whips really creamy!)
- See the notes below for detailed directions to frost the cake.
Video
Notes
- There are many gluten free cocoa powder brands. I like Rodelle, Anthony’s, and Ghirardelli. If you see lumps in the cocoa powder, I recommend sifting it into the dry ingredients.
- I have tested this recipe with King Arthur Measure for Measure GF and Bob’s Red Mill 1 to 1 GF blend. That doesn’t mean others will not work; I just have not tested other flours.
- If your gluten free flour blend doesn’t contain xanthan gum or another binder, add 3/4 teaspoon.
- To make this cake dairy-free, substitute the butter for vegan butter and use a dairy-free yogurt like the Kite Hill brand.
- I used almond milk, but other dairy-free kinds of milk will work. However, I do not recommend canned coconut milk.
When mixing the batter, do not over-mix the batter. It would result in a denser cake. - If you don’t have the mini layer pans, you can bake this cake in regular-sized cake pans or as cupcakes. Note that each cake pan size will require a different baking time.
- This cake will keep fresh for up to 3 days in the refrigerator. You can also freeze it. I recommend freezing the cake unfrosted, with each layer wrapped in plastic wrap and gently placed in a large freezer-safe zipper bag.
Email This Recipe To Me!
SPECIAL NOTE
Please know that every gluten free flour blend has a different starch to grain ratio. If you use a blend I didn’t test, my rule of thumb is to add more flour if your dough or batter is wet and add more liquid if the dough or batter is too dry!
Nutrition
Nutrition Disclaimer
Nutritional information is an estimate provided to you as a courtesy. You should calculate the actual nutritional information with the products and brands you are using with your preferred nutritional calculator.
I truly hope you enjoy this recipe. I have been testing and creating gluten-free recipes for over 15 years. Creating gluten-free recipes that do not taste gluten-free is my goal for every recipe. Sometimes I only have to test a new recipe a couple of times, and others it takes multiple times. I do this so you get reliable, delicious results every time!


This was an excellent cake! As promised, it does not taste Gluten Free. (3 of us have devoured it!) I am not Gluten intolerant, so I don’t lean towards eating GF foods because my experience with several have not been as tasty as their gluten counterparts. I’m only going to eat something GF if it tastes as good as the “regular” stuff. However, since I have an adult daughter who is gluten intolerant I look for things that she can enjoy – to at least have something along side what the rest of the family is eating. It does become cumbersome, making one thing for her and another for the rest of us. I love it when I can find a GF recipe that works for the whole family. This one hits the mark! I recently discovered “Pamela’s” gluten free flour at a local IGA (Macey’s) here in Utah, (also on Amazon). I did a comparison test of Cup4Cup and Pamela’s with your GF waffles, and my daughter and I both agreed that Pamela’s was best, so I used it here. It’s now my go to GF flour. You can buy their cake mixes, brownie mixes, etc., but being cost conscious as well, I just opted for the All Purpose Flour, Artisan blend, and so far it works great. (I want to see how it fares in bread recipes, also.)
For reference, I made this in three 6″ round pans and I believe I cooked them for 25 minutes (till toothpick was essentially clean – a few crumbs) at 350. I also used 2% milk, regular cocoa, and salted butter, in both the cake and the frosting, with no additional salt in the cake recipe. (My Foodie blogger friend told me that unsalted/salted butter in a recipe is really a taste preference and depends on what you’re used to, so I always use salted and skip any additional salt.)
Thank you Sandi, for all of the work you have put into perfecting this recipe!
Thank you so much for the high kudos for this cake recipe. I also appreciate your detailed description of what you used. I am sure this can help other readers.
Can this recipe be made into cupcakes or does it need to be modified? Thank you
This cake makes great cupcakes, no modifications except baking time.
Flavour was great but I barely got a rise. It was definitely quite dense, no cake texture more like a brownie. Also 20min it was still raw. I had to add 15min so 35min was good.
I’ll make this again for chocolate chip brownies.
Hi Jenny, I haven’t heard of this happening with this recipe. Which flour blend did you use and did you check to ensure the baking powder wasn’t expired? What was the texture and consistency of your cake batter? Did you use a stand mixer? The baking time really depends on the size and material of the cake pan.
When I bake I’ve been measuring my flour by weight rather than cups. Do you spoon the flour into the measuring cup instead of scooping to get an accurate measurement?
Hi Susan, it is tough for me to use a weight because every gluten free flour blend has a different weight. I do spoon in the flour, and I don’t pack it in.
I want to make a 3 layer 8 inch cake. Would this recipe still work or do you think I should increase the quantities of ingredients?
The mini layer pans I used are very shallow. I suspect you may need to double the recipe if you are making three big layers.
Hello, how full should I fill my cupcake pan with this batter?
Hi Megan, I fill my cupcake pan 3/4 full.
The Bob’s Red Mill 1:1 gluten free flour I have doesn’t have xantham gum listed in the ingredients. Do I need to add a tsp of xantham gum to the recipe?
Hi Cheryl, the Bob’s 1:1 should have either xanthan or guar gum in it. Please verify. You don’t want to add more if you have it in the blend.